Guide to OpenLiteSpeed's SCGI Setup
In OpenLiteSpeed v1.9 SCGI support is introduced. SCGI is a higher performance replacement for CGI that is easier to code than the faster FCGI or LSAPI for the application programmers using LiteSpeed. As with CGI, FCGI or LSAPI you must have an application you wish to use that knows the protocol.
External App
To begin configuration for your SCGI application, log in to the OpenLiteSpeed WebAdmin Console and navigate to External App for overall configuration, or if you wanted to configure a Virtual Host named Example2, navigate to Virtual Hosts > Example2 > External App.

Press the Add icon.

You will be prompted for the Type, select SCGI App and press the Next icon. This will bring you to the screen to enter SCGI parameters.
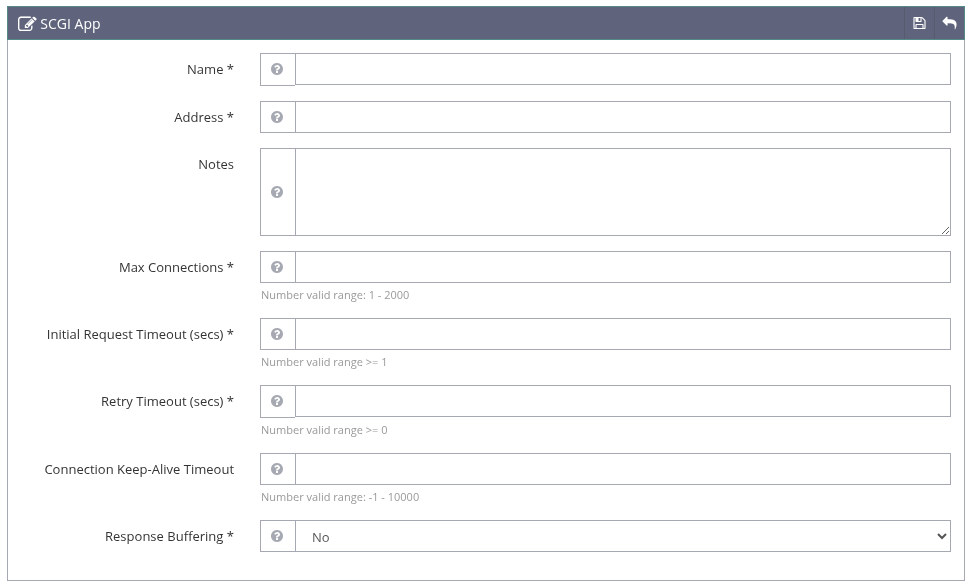
- Name: Enter a name to help you remember this App. You will need it below when you specify the Script Handler.
- Address: A unique socket address used by the external application. IPv4/IPv6 sockets and Unix Domain Sockets (UDS) are supported. IPv4/IPv6 sockets can be used for communication over the network. UDS can only be used when the external application resides on the same machine as the server. Syntax: IPv4 or IPV6
address:portorUDS://path.
Examples
127.0.0.1:5434UDS://tmp/lshttpd/php.sock
Tip
If the external application runs on the same machine, UDS is preferred. If you have to use an IPv4|IPV6 socket, set the IP address to localhost or 127.0.0.1, so the external application is inaccessible from other machines. Unix Domain Sockets generally provide higher performance than IPv4 sockets.
- Max Connections: Specifies the maximum number of concurrent connections that can be established between the server and an external application. This setting controls how many requests can be processed concurrently by an external application, however, the real limit also depends on the external application itself. Setting this value higher will not help if the external application is not fast enough or cannot scale to a large number of concurrent requests.
- Initial Request Timeout: Specifies the maximum time in seconds the server will wait for the external application to respond to the first request over a new established connection. If the server does not receive any data from the external application within this timeout limit, it will mark this connection as bad. This helps to identify communication problems with external applications as quickly as possible. If some requests take longer to process, increase this limit to avoid 503 error messages.
- Retry Timeout (secs): Specifies the period of time that the server waits before retrying an external application that had a prior communication problem.
- Persistent Connection: Specifies whether to keep the connection open after a request has been processed. Persistent connections can increase performance, but some SCGI external applications do not support persistent connections fully. The default is
On. - Connection Keep-Alive Timeout: Specifies the maximum time in seconds to keep an idle persistent connection open. When set to
-1, the connection will never time out. When set to0or greater, the connection will be closed after this time in seconds has passed. - Response Buffering: Specifies whether to buffer responses received from external applications. If a "nph-" (Non-Parsed-Header) script is detected, buffering is turned off for responses with full HTTP headers.
Press the Save icon on the top bar to save your definition and return to the External App high level tab.
Script Handler
User requests are routed to the SCGI application based on the extension of the page request. To specify the extension, select the Script Handler tab. Here again you press the Add icon in the top bar to specify a new script.
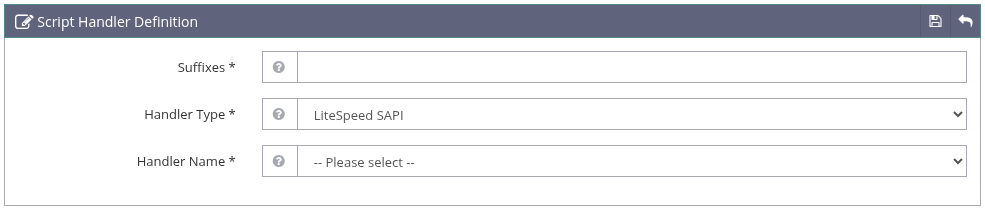
- Suffixes: Specifies the script file suffixes that will be handled by this script handler. Suffixes must be unique. Most SCGI applications use the suffix
scgi. Note you can't enter a leading dot. - Handler Type: Select
SCGIfrom the pulldown. - Handler Name: Select the External App you created above for SCGI.
Press the Save icon to save your configuration. Perform a Graceful Restart to activate your modifications.